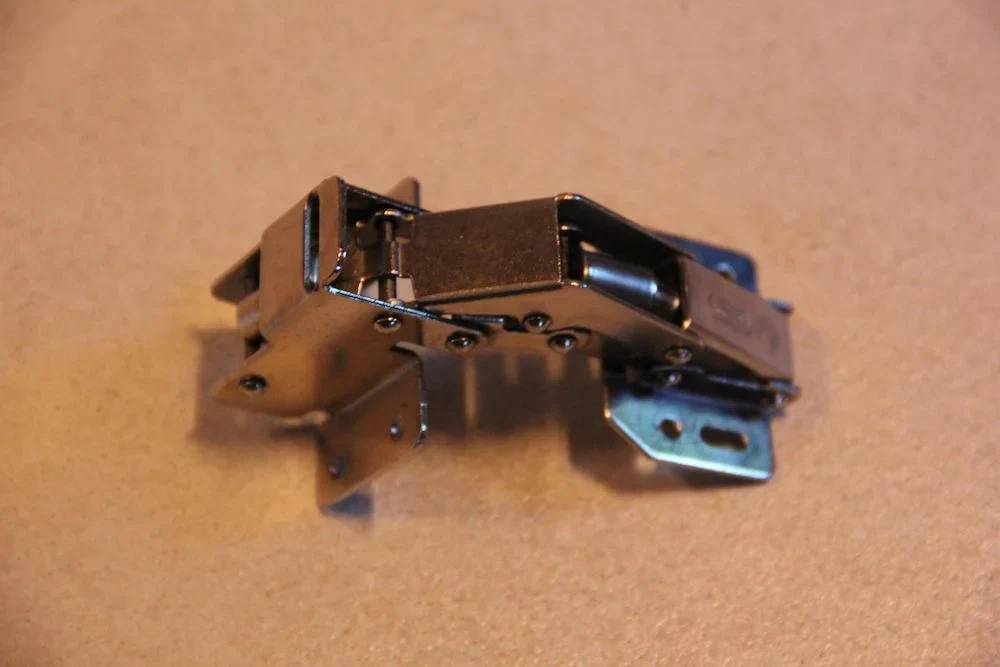
Featured image: Kitchen cabinet hinge, Frog hinge 01 by Mattis, licensed under CC BY-SA 3.0; resized and converted to WebP. This example shows a frog-style hinge, not the standard concealed-hinge layout covered below.
Adjusting kitchen cupboard hinge screws is a simple DIY fix for misaligned or stiff doors. First check that the locking screw and mounting-plate fixings are secure. Only after ruling out a loose fixing should you move the appropriate adjustment screw or cam for the axis you need to change. Always work carefully to avoid damaging the cupboard or screws. Understanding how each adjustment screw functions—such as those controlling vertical, lateral, or depth alignment—can help you troubleshoot issues like sagging or uneven gaps. Check the markings and your hinge manufacturer’s instructions first: screw positions and adjustment mechanisms vary by model. Furnica’s hinge guide illustrates one common concealed-hinge layout.
What Are Concealed Hinges and How Do They Work?
Concealed hinges, also known as European hinges, are a common feature in modern kitchen and wardrobe cabinetry. Unlike visible hinges, these are hidden behind the cupboard door, offering a sleek appearance while enabling precise door alignment. Some versions include optional soft-close damping, while many have adjustment mechanisms to correct misalignment over time. A typical example is the 35 mm cup hinge, which is widely used in UK kitchens due to its compatibility with standard cabinet depths and adjustability features.
These hinges operate through a system of adjustment screws that control movement across three axes: vertical (up/down), lateral (side-to-side), and depth (in/out). Each axis is managed by specific screws located on the hinge arm or the mounting plate attached to the cabinet carcass. For instance, vertical adjustments might address sagging doors, while lateral adjustments can resolve gaps between the door and frame. Depth adjustments help align doors that appear to protrude or recess unevenly. This 3D adjustment mechanism allows users to fine-tune the door’s position without replacing the entire hinge system.
First check whether a locking screw has loosened; Handyman Know How recommends checking this before changing alignment. Choose a screwdriver that fits the actual screw head rather than forcing one type. Some hinges include an additional bolt for side-to-side movement, as noted in guides like Handyman Know How’s cupboard-door repair guide, which explains how modern concealed hinges combine functionality with ease of use. Understanding these mechanisms ensures that minor misalignments caused by daily use or temperature changes can be corrected quickly, maintaining the cabinet’s appearance and functionality without specialized tools.
Identifying the Three Adjustment Axes
Identify which door edge is out of line before touching a screw: height, side gap and depth are different adjustments. The practical sequence below deals with each separately.
- Vertical Adjustment (Height): This controls the door’s up-and-down position. On most hinges, vertical alignment is managed by the fixing screws on the mounting plate, which is attached to the cabinet carcass. Loosening these screws allows the door to slide vertically within slotted holes, while tightening them locks the position. For example, Furnica’s guide explains that this adjustment is critical for correcting sagging doors or uneven gaps between the door and the frame.
- Lateral Adjustment (Side-to-Side): This addresses the door’s horizontal alignment, ensuring it sits flush with adjacent cabinets or doesn’t create uneven reveals. The front-most screw on the hinge arm typically governs this movement. Turning it clockwise or counterclockwise shifts the door left or right. This is particularly useful when doors are misaligned due to uneven floor levels or cabinet warping.
- Depth Adjustment (In-and-Out): This controls how close or far the door sits from the cabinet frame, preventing binding or gaps. On many hinges, this is managed by the rear screw on the hinge arm or an integrated cam screw on newer models. Adjusting this screw moves the door inward or outward, which is essential for doors that rub against the frame or fail to close properly.
Make one small change at a time and test the door. Adjustment cams can turn while mounting fixings remain secure; only loosen a fixing where your hinge design requires the plate to slide, support the door, and fully retighten that fixing before testing.
Tools for a careful adjustment
Before adjusting kitchen cupboard hinge screws, gather the right tools to ensure precision and avoid damage. Use a manual screwdriver that matches the screw head. Furnica recommends PZ2 for the hinges it describes, while The Big Idea describes a Phillips screwdriver for other fittings. Do not force a mismatched tip or use an impact driver on a small adjustment screw.
A soft cloth is also useful for cleaning hinge surfaces before adjustment. Dust, grime, or debris can interfere with the smooth movement of hinges, making it harder to achieve proper alignment. Wiping the hinges with a cloth ensures the adjustment screws and cam mechanisms operate freely.
For precise vertical alignment, a spirit level can help identify if a door is sagging or sitting too high. While not always necessary for minor adjustments, it adds accuracy when dealing with significant misalignment. Some guides, like The Big Idea’s, note that vertical adjustments are often required when doors drop below the cabinet carcass, and a level helps confirm when the door is properly aligned.
Lastly, a small container or cloth to hold screws temporarily is handy. This prevents losing tiny screws during the process, which can be frustrating and time-consuming to retrieve.
These tools work together to make adjustments efficient and safe. Always handle hinges carefully, as overtightening or forcing them can damage the cam mechanisms or the cabinet itself. For more details on why a Pozidriv screwdriver is recommended, refer to Furnica’s guide on hinge adjustment mechanisms.
Adjust one axis at a time
Open the door and inspect both hinges. Before moving anything, check that the locking screw connecting the hinge arm to the mounting plate is secure and that the screws fixing each plate are sound. A loose locking screw can let the two parts slide and imitate a deeper alignment problem, as Handyman Know How explains. If a fixing spins without gripping, stop rather than repeatedly tightening a stripped hole.
- Side-to-side gap: On the common concealed-hinge layout described by Furnica, the front screw on the hinge arm moves the door laterally. Turn it a small amount clockwise, close the door and observe which way the edge moved; reverse direction if the gap worsens. Repeat on the other hinge as needed. The direction of door movement depends on hinge orientation, so do not assume a clockwise turn always moves it right.
- In-and-out fit: Find the rear adjustment screw or cam on your particular hinge. Where the model uses a locking rear screw, loosen it slightly, move the door in or out until it clears the frame and retighten. A cam type may turn without loosening. Test closure after each small change; do not force a door that catches.
- Height: Support the door’s weight while loosening the mounting-plate fixing screws on both hinges just enough to let the plate slide in its slots. Raise or lower the door a few millimetres, hold it in place and retighten both plates before releasing it. Handyman Know How describes this slotted-plate adjustment. Work with another person if the door is heavy or difficult to hold.
Close and reopen the door after each adjustment. If the hinge has no matching screw or slot, do not assume the steps apply: identify the model or ask a cabinet fitter. Stop if the mounting plate is loose in damaged board or the door cannot be safely supported.
Common Issues and How to Avoid Damage
Adjusting kitchen cupboard hinge screws can be straightforward, but several common issues may arise if the process is not handled carefully. One frequent problem is over-tightening the screws, which can cause the hinge to become rigid and prevent the door from opening or closing smoothly. This can also lead to damage to the screw threads or the surrounding wood, making future adjustments more difficult. Retighten mounting and locking screws securely after adjustment; the hinge joint must still articulate normally when the door opens. Do not leave a mounting fixing loose to create movement. If the door still does not align correctly, it may be necessary to adjust the position of the hinge itself rather than continuing to tighten the screws.
Another issue is misalignment, which can occur if the hinge is not properly positioned on the door or the cabinet frame. This can result in gaps between the door and the cabinet, or the door may not sit flush with the surrounding panels. To prevent misalignment, ensure that the hinge is correctly seated in both the door and the frame before tightening the screws. If the hinge is not aligned properly, it may be necessary to loosen the screws slightly and reposition the hinge before tightening again.
In some cases, the adjustment screws may not stay in place, which can be a sign of stripped threads or loose mounting plate screws. If this happens, it is important to check the mounting plate screws and tighten them if they are loose. If the threads are stripped, replacing the hinge may be necessary to restore proper function.
By taking these precautions and carefully following the adjustment process, you can avoid common issues and ensure that your cupboard doors operate smoothly without causing damage to the hinges or the surrounding cabinet structure. For more detailed guidance on adjusting hinges and troubleshooting common problems, you can refer to The Big Idea’s hinge-adjustment guide.
Disclosure: As an Amazon Associate I earn from qualifying purchases. Links in the related-products section are paid links.
Related products
This article may be complemented by concealed kitchen cupboard hinges with adjustment screws.